INSTALL YOUR OWN FLOORING
and start living your own storywe use the patented Unifit X system, which makes fitting extremely simple and fast. Planks are held together by the use of a click-type tongue and groove system.
BEFORE INSTALLING
Do not open the flooring packaging until just before installation.
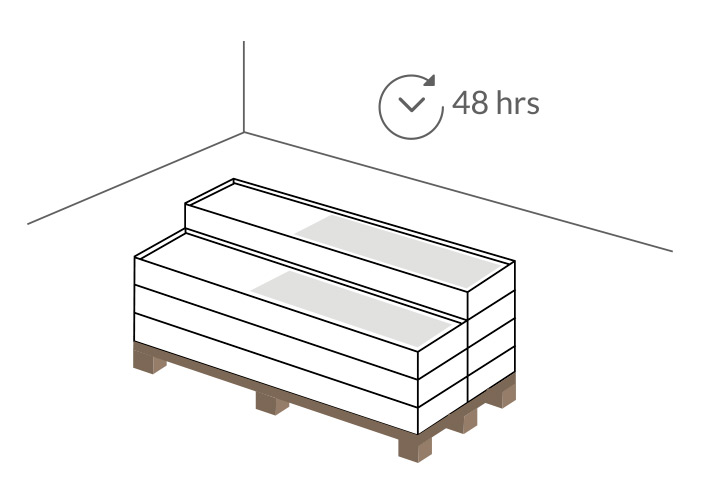
Boxes must be stored 48 hours before installation in the same climatic conditions (temperature and humidity) as the room where the installation will be. This is an essential condition for proper placement and long-term sustainability of the flooring.
The flooring packaging should be placed in the centre of the room, never against a wall. It must always be stored horizontally to prevent bending, and never in direct contact with the floor.
 Pencil
 Saw / Coping saw
 Cutter
 Metre
Metre
 Wedges
 Screws, nails
 or glue
OPTIMAL CHARACTERISTICS OF THE FLOOR
Our floorings can be installed on any surface that is solid and firm, but the ideal conditions for the installation are as follows
 Temperature between 16 °C and 21 °C and an atmospheric humidity between 40% and 60%.
 The floor must be dry and the humidity must be under:
· 2.5% if there isn’t underfloor heating
· 2% if there is underfloor heating
· 10% for multiplex
 The surface where you want to install the flooring must be clean and dust free.
 Firm, without any loose particles, and levelled. Maximum height difference can only by of 4 mm every 2 linear metres.

1. INSULATING UNDERLAY
Before laying the flooring, it is recommended to apply waterproof underlay that protects both the flooring and the skirting from moisture. The insulating base should go 5 cm up in the wall. Once the flooring has been laid and the installation is finished, the excess can be cut off at ground level.

2. LAYOUT DIRECTIONS
To highlight the beauty of natural wood, we recommend placing the planks parallel to the entrance of the light or in the direction of the longest wall.

3. EXPANSION OF THE FLOORING
Natural wood flooring may expand and contract due to changes in the climatic conditions of the room.
Please leave gaps with a width of 10 mm between the planks and fixed elements such as walls, door frames, beams, stairs, pipes, etc. Place wedges in these gaps.

4. FIRST ROW
First, the entire surface of the installation must be measured. If the calculation results in a last row of boards having a width under 5 cm, you will need to cut down the width of the first row.
Installation should be done from left to right and from the inside to the outside of the room.

4.a. FIRST BOARD
Cut the tongue on the long side of the board and lay the board in the corner of the room, leaving a 10 mm gap between the wall and the board on both sides.
For the rest of the boards in the first row, cut the tongues on the long side that faces the wall.

4.b. FINISHING UP THE FIRST ROW
Use the remainder of the last board in the first row to start the second row.

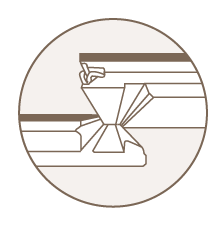
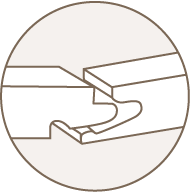
5. SECOND ROW
Slide the plank’s tongue through the groove of the boards in the first row.

5.a. SLIDE
Keep the plank at an angle and slide it down until it reaches the next board.

5.b. JOIN
Press down to join the boards together. Make sure that the plastic on the shorter side of the board has joined correctly and that there is no gap.

6. LAST ROW
It is necessary to leave again a 10 mm expansion wedge between the last board and the wall. Cut the boardsin the last row to the right length.

7. DOOR FRAMES AND HEATING PIPES
For door frames, make sure to leave a 10 mm expansion gap around the frame and cut the boards accordingly.
For pipes, make a hole of 15 mm in diameter. It is important that the expansion gap is closed to prevent moisture in the floor. You can use sealant around the pipes to seal the gaps and apply PVC trim rings afterwards.

8. FINISHING UP
You can walk on the floor immediately after finishing the installation because it doesn’t require any glue.
Remove the wedges and fix the skirting to the wall (never to the floor). It is always recommended to finish with a skirting or perimeter trim.